Less than a year before writing this article I was wondering why people spend 600$ on custom keyboards. “My blue switches are good! They’re loud and clicky”, I thought. Who knew I’d be sitting on my desk with a custom board today?
Well, that is exactly what has happened, and I can’t help but review this magnificent board. So let’s get started!
Unboxing
The keyboard came in a simple black box, reminiscing of the box that you find when unboxing a new Graphics Card. The box had a nice Monsgeek logo and the name of the board imprinted on it. Moreover, the box had semi-transparent imprintings of the Monsgeek logo all over the place. It almost looks like a disproportioned shoe box (one which contains an expensive shoe, I might add).

Inside the box, you get the accessories box at the top, and under that, the bread and butter of the package, the barebones set itself.
Opening the accessories box, we find a USB-C cable. The cable, despite not being braided, is actually quite thick and does look and feel premium. Aside from the cable, we have a purple wireless dongle that comes in a ziplock bag. However, it fits into my USB port rather tightly. I would have liked it bit not-so-tighter.

Under both the keyboard and the accessories box, we find the manual. However, the printed version comes dreadfully in Chinese. But thankfully, the PDF version of the manual does come in English as well as Chinese.
Now, let us take a look at the board itself.
First Impressions and Specifications
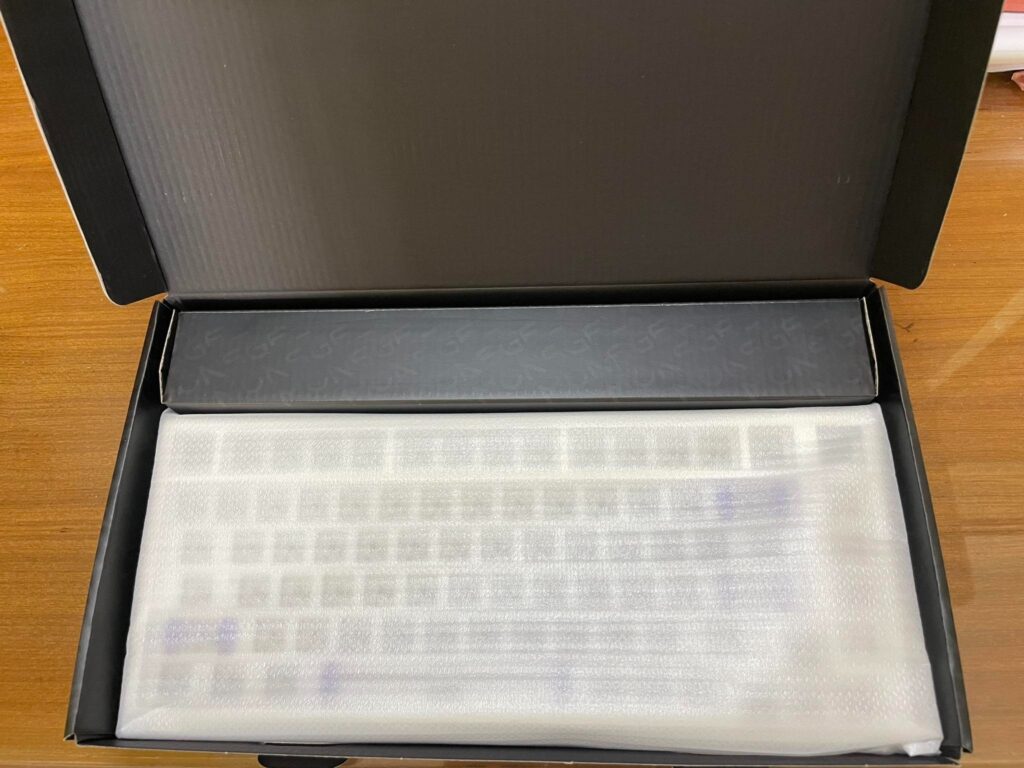
It comes wrapped in PE foam which, in all honesty, is fantastic. The PE foam mod is one of the most popular mods in the community. So yes, magnificent touch.

Unwrapping the PE foam, we get to see the board itself, which comes in a beautiful white accent with vibrant purple stabilizers. Anyone who saw it at home was mesmerized seeing the white accent. Moreover, it is heavier than a regular board which gives off a premium feel.

The board has rubber feet at the bottom, which I might add, offer some decent friction.
There is a mode switching button on the back. It allows you to switch between USB, Windows and MacOS modes. The USB allows for a wired connection and the other two offer wireless connections. It is worth mentioning however, that using the Windows mode, I am being able to use it seamlessly on Arch Linux. However, I would have liked the button to feel snappier instead of the mushy feel that it gives off. Anyways, it is not a big deal as you do not have to change modes that often.

The board also has two-stage feet if you want an angled typing experience. I must say, if you have both feet out, the board does feel somewhat like a typewriter. The feet do feel somewhat sturdy and should be enough to hold this board.
The board weighs around 650 grams barebones. This is heavier than your average keyboard, but rather lightweight for a custom one.
Like many other boards, it also has cable routing users which allows wired users to have the wire coming out from either side. But their approach is somewhat weird for this board as it comes out right from the sides instead of coming out of the front of the board. This might cause interference with your mouse or other devices.
The Lack of Backlighting
The keyboard has no backlight at all. This might be a turnaround for many people, as many other boards with similar features come with RGB at this price. However, I believe it was not too important. In fact, I appreciate the fact that they did the cost cutting in terms of RGB, and rather included some dampening materials. But miraculously, the manual, in the Mac section, mentions controls for backlighting. I am not quite sure whether this board has a backlit version.
The Mounting System and the Plate
This board uses a tray mount. That means, the PCB is held up using a set of screws attached to a plate. Theplate is made of steel, which, honestly speaking, I am not a huge fan of. I would not complain if it were aluminium. However, I do not fancy steel as it is subject to corrosion via rusting.
The tray mount offers virtually no flex at all. This is fine by me, but if you like those flexy gasket mounted boards, you might not enjoy typing on this.
Software and Operating System Support
This board may be controlled using the Monsgeek Cloud Driver. However, as a Linux user, Monsgeek, like most other brands, has stripped me off the privilege. Hence, I am unable to talk about that.
However, as I mentioned previously, this board work out of the box on Linux. So that is something that I must appreciate here.
Wireless Mode and Battery
This board only has a 500 mAh battery. This is extremely tiny when compared with something like the GMK67, which has a 3000 mAh battery. When you open up the case, you can actually see how tiny the battery is.
I have not tried out the software so I cannot tell whether you can check the battery percentage via the Monsgeek cloud driver. However, there is a way to check it physically. You have to select the Windows mode and your dongle out or your PC shut off. If you press any of the switches, then the three LEDs to the right hand side of the keyboard will indicate your battery estimate. The same also happens when your keyboard connects to your PC.
However, as mentioned previously, this board has no RGB whatsoever. As such, the battery does last for a long time. Monsgeek claims that this battery is to last around four months, which is a bold estimate. I have been using this keyboard for around two weeks and I am still getting three LEDs. This is impressive for such a tiny battery. I, therefore, believe that the claim is somewhat accurate.

PCB Orientation and the Interference with Cherry Profile Keycaps
Like most other boards around this price point, it comes with a north-facing PCB. That means, the pins of the board are facing downwards. As a result, you may expect some interference with Cherry profile keycaps. Basically, the keycaps will hit the top housing of the switches if you try to use them with this board.
This will not render the switches unusable, but will create a weird ticking noise. This can be annoying for us keyboard audiophiles. Thus, before you get keycaps, you are advised to check the keycap profile and avoid the Cherry profile ones.
Despite not being a deal breaker, this acts as a huge barrier in terms of customization, as a lot of fantastic keycaps are indeed, Cherry profile.

Disassembly and Reassembly
One of the main reason behind me getting a new keyboard, is because I was not enjoying the hassle of Outemu Hotswap sockets. Splendid enough, this board comes with Universal Hotswap sockets. These are the Kailh Hotswaps sockets here. The hotswap sockets are great. The switches are secured well in place, yet it is easy to pull them out. That means, I can finally use my switch puller instead of a flathead which saves me a ton of hassle.
When it comes to disassemblying the board, at first, you have to pull off the cover. It is attached to the board with no screws whatsoever, so you have to pull it off using a credit card or just push it out. I did the latter, and it was alright. It is worth mentioning that the task is easier (and safer) if all of your keycaps are out.
Once you have removed the cover, you have to unscrew all the screws that hold it in place, as it is a tray mount. Do not try to remove the plate without taking off the cover, as there are a couple of screws hidden underneath it.
After taking off the screws, you have to simply remove the plate and that will give you access to the inside of the case.
Taking a look at the PCB, you can see that there is indeed a daughterboard and a battery, and also a thin layer of eva foam. I will discuss the dampening in the next paragraph. The daughterboard and the battery are connected to the PCB via wires. This makes it easy to do things like the tape mod and other mods to the case.
The reassembly is just the opposite task. However, I must impress upon the fact that the screws are not great. In fact, I overtightened one and the head came off. So I would suggest you being careful with the screws.
Stabilizers
This board comes with pre-clipped and pre-lubed stabilizers. The stabilizers do not have much rattle, however, the ticking is obnoxious. And they are loud. As a result, holee mod is a must-do for this board.
As I do not have lube at the moment, I have not holee modded it yet. But that does not mean I will not.
In order to deal with the ticky stabilizers, I have put some double-sided tape and some PE foam inside the keycaps for the stabilizer keys. I must say, this mod does help.
Stock Sound Dampening Materials
For a kit at this price range, it offers quite a good selection of sound dampening materials.
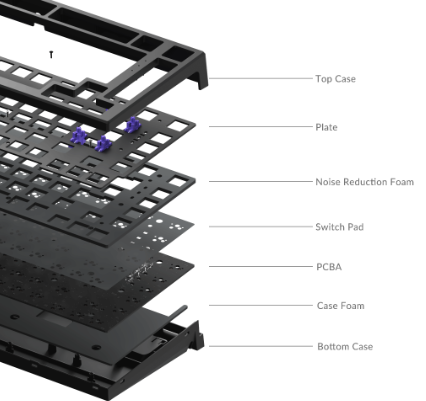
Between the PCB and the plate, Monsgeek has included an Eva plate foam and Poron switch foam. Underneath the PCB, meaning under the plate, there is a thin layer of Eva foam which acts as case foam. From a kit at this price range, I certainly did not expect this much dampening material.
The materials between the plate and the PCB are decent enough. There is a poron switch foam and an eva plate foam. Both eva and poron foam absorb sound, and it does the opposite of PE foam. PE foam reflects the sound back and gives a marbly and somewhat creamy, eva and poron foam absorb it and give somewhat of a clacky sound signature.
However, the same cannot be said about the stock case dampening material. As I mentioned above, for case dampening, there is a thin layer of eva foam as case foam. However, I really am not kidding when I say ‘thin’. That means, like most other boards around this price point, this board is hollow. Apparently, other Monsgeek boards, such as the Monsgeek M1 also suffer from this problem.
Despite the material between the plate and the PCB being decent, the same cannot be said about the case. That is to the credit of the thin eva foam. In fact, the first thing that I noticed after building the board is how pingy and hollow the sound was. And that brings us to our next topic.

Default Accoustics and Accoustic Modifications
When it comes to the default sound profile, it is incredibly hollow and pingy without modifications. So, unless you are using headsets or you do not care about the sound, you can expect to have to mod this keyboard. The hollowness is caused by the lack of dampening materials in the case as mentioned previously.
However, it is not too challenging to mod. In fact, you can stuff in a piece of bubble wrap inside to make a difference. That is exactly what I did, and the difference was night and day. As such, I can say that, with adequate modding, this board has potential to sound good.
As the board has a battery, tape mod is out of the equation. I am not risking it with PE foam either, thanks to static risks. However, I did cut out PE foam pads and use them instead of an entire sheet. That worked incredibly well and my board sounds a lot deeper now.
Time for sound tests!
Stock Materials + Bubble Wrap
Stock Materials + Bubble Wrap + One Layer PE Foam
Conclusion
Custom keyboards are expensive. Amidst all the boards costing upwards of a hundred dollars and still being called “budget”, Monsgeek, with their 50$ kit has managed to impress me quite a lot. It contains all the basic features a custom keyboard should have, such as 5-pin hotswap sockets, a bit of dampening, a good layout, wireless support, n-key rollover et cetera. Monsgeek has managed to find out the right places to cut costs. That can be visible in the forms of complete lack of backlight, the board being devoid of bluetooth, and the lack of a knob.
If there is anything about this board that bothers me, it is the north-facing PCB and the weak screws. But except for that, I am satisfied with the board. With minimal modding, it has been able to satisfy my taste for keyboard sounds.
So, for a 55$ kit, I would suggest it unless you have a liking for the gimmicky stuff like RGB and the knob. In that case, I would suggest the KM84.
Thank you for reading, have a great day!